
Table Of Contents
Previous topic
12. User Authentication with Django-Registration-Redux
12. User Authentication with Django-Registration-Redux
Note
A newer version of this tutorial using Django 1.9 is available from Leanpub: https://leanpub.com/tangowithdjango19
In this chapter, we will be styling Rango using the Twitter Bootstrap 3.2 toolkit. We won’t go into the details about how Bootstrap works, and we will be assuming you have some familiarity with CSS. If you don’t, check out the CSS chapter so that you understand the basics and then check out some Bootstrap tutorials. However, you should be able to go through this section and piece things together.
To get started take a look at the Bootstrap 3.2.0 website - it provides you with sample code and examples of the different components and how to style them by added in the appropriate style tags, etc. On the Bootstrap website they provide a number of example layouts which we can base our design on.
To style Rango we have identified that the dashboard style more or less meets our needs in terms of the layout of Rango, i.e. it has a menu bar at the top, a side bar (which we will use to show categories) and a main content pane. Given the html from the bootstrap website we need to do a bit of work on it before we can use it. This is what we did, the resulting html, which you can copy is below:
<!DOCTYPE html>
<html lang="en">
  <head>
    <meta charset="utf-8">
    <meta http-equiv="X-UA-Compatible" content="IE=edge">
    <meta name="viewport" content="width=device-width, initial-scale=1">
    <meta name="description" content="">
    <meta name="author" content="">
    <link rel="icon" href="http://getbootstrap.com/favicon.ico">

    <title>Rango - {% block title %}How to Tango with Django!{% endblock %}</title>

    <link href="http://getbootstrap.com/dist/css/bootstrap.min.css" rel="stylesheet">
    <link href="http://getbootstrap.com/examples/dashboard/dashboard.css" rel="stylesheet">

    <!--[if lt IE 9]>
      <script src="https://oss.maxcdn.com/html5shiv/3.7.2/html5shiv.min.js"></script>
      <script src="https://oss.maxcdn.com/respond/1.4.2/respond.min.js"></script>
    <![endif]-->
  </head>

  <body>

    <div class="navbar navbar-inverse navbar-fixed-top" role="navigation">
      <div class="container-fluid">
        <div class="navbar-header">
          <button type="button" class="navbar-toggle collapsed" data-toggle="collapse" data-target=".navbar-collapse">
            <span class="sr-only">Toggle navigation</span>
            <span class="icon-bar"></span>
            <span class="icon-bar"></span>
            <span class="icon-bar"></span>
          </button>
          <a class="navbar-brand" href="/rango/">Rango</a>
        </div>
        <div class="navbar-collapse collapse">
          <ul class="nav navbar-nav navbar-right">
                <li><a href="{% url 'index' %}">Home</a></li>
                    {% if user.is_authenticated %}
                        <li><a href="{% url 'restricted' %}">Restricted Page</a></li>
                        <li><a href="{% url 'auth_logout' %}?next=/rango/">Logout</a></li>
                        <li><a href="{% url 'add_category' %}">Add a New Category</a></li>
                    {% else %}
                        <li><a href="{% url 'registration_register' %}">Register Here</a></li>
                        <li><a href="{% url 'auth_login' %}">Login</a></li>
                    {% endif %}
                                <li><a href="{% url 'about' %}">About</a></li>

              </ul>
        </div>
      </div>
    </div>

    <div class="container-fluid">
      <div class="row">
        <div class="col-sm-3 col-md-2 sidebar">
                {% block side_block %}{% endblock %}

        </div>
        <div class="col-sm-9 col-sm-offset-3 col-md-10 col-md-offset-2 main">
           <div>
                {% block body_block %}{% endblock %}
                </div>
        </div>
      </div>
    </div>

    <!-- Bootstrap core JavaScript
    ================================================== -->
    <!-- Placed at the end of the document so the pages load faster -->
    <script src="https://ajax.googleapis.com/ajax/libs/jquery/1.11.1/jquery.min.js"></script>
    <script src="http://getbootstrap.com/dist/js/bootstrap.min.js"></script>
    <!-- IE10 viewport hack for Surface/desktop Windows 8 bug -->
    <script src="http://getbootstrap.com/assets/js/ie10-viewport-bug-workaround.js"></script>
  </body>
</html>
If you take a close look at the dashboard html source, you’ll notice it has a lot of structure in it created by a series of <div> tags. Essentially the page is broken into two parts - the top navigation bar and the main pane which are denoted by the two <div class="container-fluid"> tags. In the nav bar section, we have injected all the links to the different parts of our website. Inside the main pane, there are two columns, one for the side_block, and the other for the body_block.
Update your base.html with the html code above (assumes you are using the django-registration-redux package, if not you will need to update those url template tags). Reload your application. Obviously you will need a connection to the internet in order to download the css, js, and other related files. You should notice that your application looks heaps better with this one changes. Flip through the different pages. Since they all inherit from base, they will all be looking pretty good. Not perfect, but pretty good.
Note
You could download all the associated files and stored them in your static folder. If you do this, simply update the base template to reference the static files stored locally.
Now that we have the base.html all set up and ready to go, we can do a really quick face lift to Rango by going through the Bootstrap components and selecting the ones that suit the pages.
Lets update the about.html template, by putting a page header on the page (http://getbootstrap.com/components/#page-header). From the example, all we need to do is provide an encapsulating <div> with the class="page-header":
{% extends 'base.html' %}

{% load staticfiles %}

{% block title %}About{% endblock %}

{% block body_block %}
    <div class="page-header">
                <h1>About</h1>
            </div>
            <div>
            <p></strong>.</p>

            <img  width="90" height="100" src="{% static "images/rango.jpg" %}" alt="Picture of Rango" /> <!-- New line -->
            </div>
{% endblock %}

Figure 1: A screenshot of the About page without style.
#TODO(leifos):update this screen shot.

Figure 2: A screenshot of the About page with Bootstrap Styling applied.
#TODO(leifos):update this screen shot.
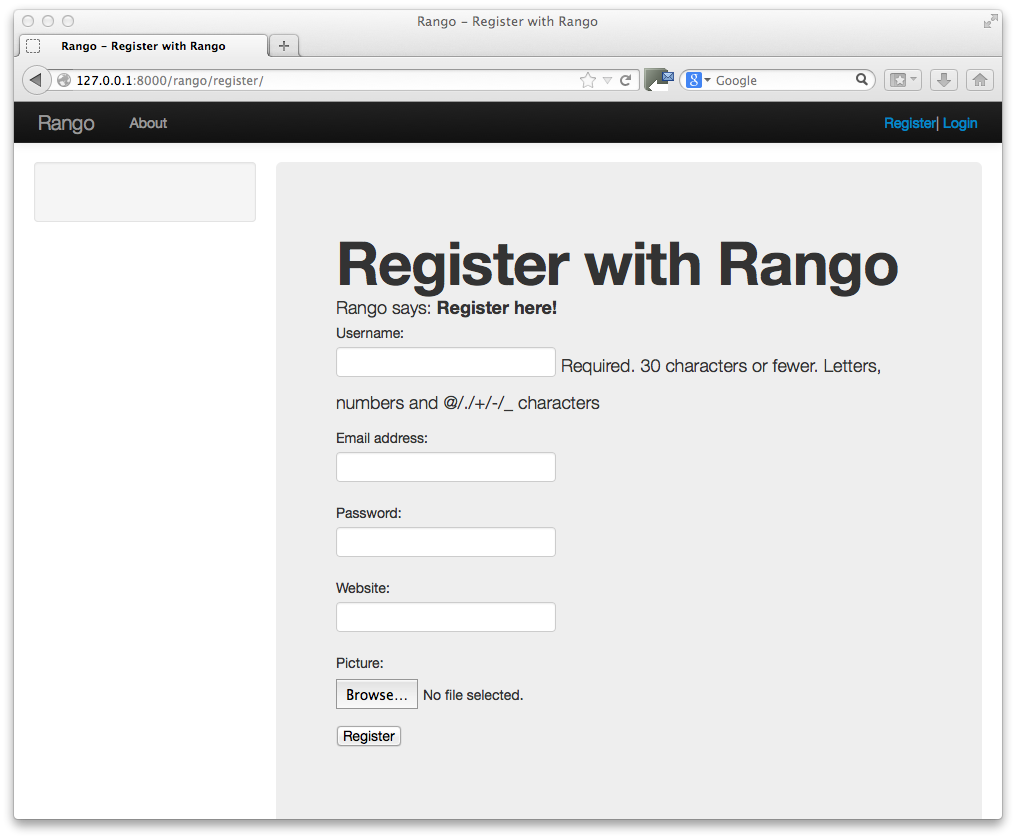
Figure 3: A screenshot of the Registration page with Bootstrap Styling applied but not customised.
#TODO(leifos):update this screen shot.
Also, you’ll probably have noticed the sidebar is empty. In the next chapter we will sort that out with some handy navigation links. But first, lets sort out the Index page.
Since we have only encapsulated the title with a page header i.e. <div class="page-header">, we haven’t really capitalised on the classes and styling that Bootstrap gives us. So here we have taken the columns from the fluid page and used them to house the top categories and top pages. Since the original page had four columns, we have taken two and made them bigger by adjusting the column sizes. Updatet the index.html template to look like the following:
{% extends 'base.html' %}

{% load staticfiles %}

{% block title %}Index{% endblock %}

        {% block body_block %}
{% if user.is_authenticated %}
    <div class="page-header">

                <h1>Rango says... hello {{ user.username }}!</h1>
            {% else %}
                <h1>Rango says... hello world!</h1>
            {% endif %}
</div>

         <div class="row placeholders">
            <div class="col-xs-12 col-sm-6 placeholder">
               <h4>Categories</h4>

              {% if categories %}
                    <ul>
                        {% for category in categories %}
                         <li><a href="{% url 'category'  category.slug %}">{{ category.name }}</a></li>
                        {% endfor %}
                    </ul>
                {% else %}
                    <strong>There are no categories present.</strong>
                {% endif %}

            </div>
            <div class="col-xs-12 col-sm-6 placeholder">
              <h4>Pages</h4>

                {% if pages %}
                    <ul>
                        {% for page in pages %}
                         <li><a href="{{page.url}}">{{ page.title }}</a></li>
                        {% endfor %}
                    </ul>
                {% else %}
                    <strong>There are no categories present.</strong>
                {% endif %}
            </div>

          </div>


       <p> visits: {{ visits }}</p>
        {% endblock %}
The page should look a lot better now. But the way the list items are presented is pretty horrible. Lets use the list-group style provided by Bootstrap, http://getbootstrap.com/components/#list-group. Change the <ul> elements to <ul class="list-group"> and the <li> elements to <li class="list-group-item"> then update the headings using a panel style:
    <div class="panel panel-primary">
    <div class="panel-heading">
            <h3 class="panel-title">Categories</h3>
    </div>
</div>


    <div class="panel panel-primary">
            <div class="panel-heading">
                    <h3 class="panel-title">Pages</h3>
            </div>
    </div>
Replacing <h4>Categories</h4> and <h4>Pages</h4> respectively. Now the page should look pretty neat.

Figure 4: A screenshot of the Index page with a Hero Unit.

Figure 5: A screenshot of the Index page with customised Bootstrap Styling.
Now let’s turn our attention to the login page. On the Bootstrap website you can see they have already made a nice login form, see http://getbootstrap.com/examples/signin/. If you take a look at the source, you’ll notice that there are a number of classes that we need to include to pimp out the basic login form. Update the login.html template as follows:
{% block body_block %}

<link href="http://getbootstrap.com/examples/signin/signin.css" rel="stylesheet">

<form class="form-signin" role="form" method="post" action=".">
{% csrf_token %}

<h2 class="form-signin-heading">Please sign in</h2>
<input class="form-control" placeholder="Username" id="id_username" maxlength="254" name="username" type="text" required autofocus=""/>
<input type="password" class="form-control" placeholder="Password" id="id_password" name="password"  required />

        <button class="btn btn-lg btn-primary btn-block" type="submit" value="Submit" >Sign in</button>
        </form>

{% endblock %}
Besided adding in a link to the bootstrap signin.css, and a series of changes to the classes associated with elements, we have removed the code that automatically generates the login form, i.e. form.as_p. Instead, we took the elements, and importantly the id of the elements generated and associated them with the elements in this bootstrapped form.
In the button, we have set the class to btn and btn-primary. If you check out the Bootstrap section on buttons you can see there are lots of different colours that can be assigned to buttons, see http://getbootstrap.com/css/#buttons.

Figure 6: A screenshot of the login page with customised Bootstrap Styling.
#TODO(Leifos): update the screen shot
You can apply similar changes to add_cagegory.html and add_page.html templates. For the add_page.html template, we can set it up as follows.
{% extends 'base.html' %}

{% block title %}Add Page{% endblock %}


{% block body_block %}
{% if category %}

                <form role="form"  id="page_form" method="post" action="/rango/category/{{category.slug}}/add_page/">
            <h2 class="form-signin-heading">Add a Page to <a href="/rango/category/{{category.slug}}/"> {{ category.name }}</a></h2>
                    {% csrf_token %}
                    {% for hidden in form.hidden_fields %}
                        {{ hidden }}
                    {% endfor %}

                    {% for field in form.visible_fields %}
                        {{ field.errors }}
                        {{ field.help_text }}<br/>
                        {{ field }}<br/>
                    {% endfor %}

                <br/>
            <button class="btn btn-primary" type="submit" name="submit">Add Page</button>
                </form>
            {%  else %}
            <p>This is category does not exist.</p>
        {%  endif %}


        {% endblock %}
And similarly for the add_category.html template (not shown).
For the registration_form.html, we can update the form as follows:
{% extends "base.html" %}


{% block body_block %}
<form role="form"  method="post" action=".">
                {% csrf_token %}

<h2 class="form-signin-heading">Sign Up Here</h2>

<div class="form-group" >
 <p class="required"> <label for="id_username">Username:</label>
     <input class="form-control"  id="id_username" maxlength="30" name="username" type="text"  placeholder="Enter username"/></p>
</div>
 <div class="form-group">
    <p class="required"><label for="id_email">E-mail:</label>
        <input class="form-control" id="id_email" name="email" type="email" placeholder="Enter email" /></p>
 </div>
<div class="form-group">
    <p class="required"><label for="id_password1">Password:</label>
        <input class="form-control" id="id_password1" name="password1" type="password" placeholder="Enter password" /></p>
</div>
<div class="form-group">
    <p class="required"><label for="id_password2">Password (again):</label>
 <input class="form-control" id="id_password2" name="password2" type="password" placeholder="Enter password again" /></p>
</div>

<button type="submit" class="btn btn-default">Submit</button>

        </form>
{% endblock %}
Again we have manually transformed the form created by the {{ form.as_p }} template tag, and added the various bootstrap classes.
Note
I am not happy with this solution. I would prefer this to be automated. It does give you an idea of the class from bootstrap which you need to augment your html templates though.
A simple alternative would be to use django-bootstrap-toolkit see https://github.com/dyve/django-bootstrap-toolkit. Note that there are other packages like this. To install the django-bootstrap-toolkit run, pip install django-bootstrap-toolkit. Add, bootstrap_toolkit to the INSTALLED_APPS tuple in settings.py. Then modify the template like that shown below:
In which case the category.html template would become:
{% extends ‘base.html’ %}
{% load bootstrap_toolkit %}
{% block title %}Add Category{% endblock %}
- {% block body_block %}
- <form id=”category_form” method=”post” action=”{% url ‘add_category’ %}”>
<h2 class=”form-signin-heading”>Add a Category</a></h2>
{% csrf_token %}
{{ form|as_bootstrap }}
<br/>
<button class=”btn btn-primary” type=”submit” name=”submit”>Create Category</button>
</form>
{% endblock %}
This solution is much cleaner, and automated. However, it does not render as nicely :-(. Probably requires some tweaking to improve how it renders.
Now that Rango is starting to look better we can go back and add in the extra functionality that will really pull the application together.

Figure 7: A screenshot of the Registration page with customised Bootstrap Styling.